Showing posts with label Mike Vasconcellos. Show all posts

Friday, October 14, 2016

New 5'6" alaia for belly riding

I really love riding prone.  I do it more than regular standup surfing.  Its a whole different world when you are on your belly, your nose just inches above the water.  And every day is big!
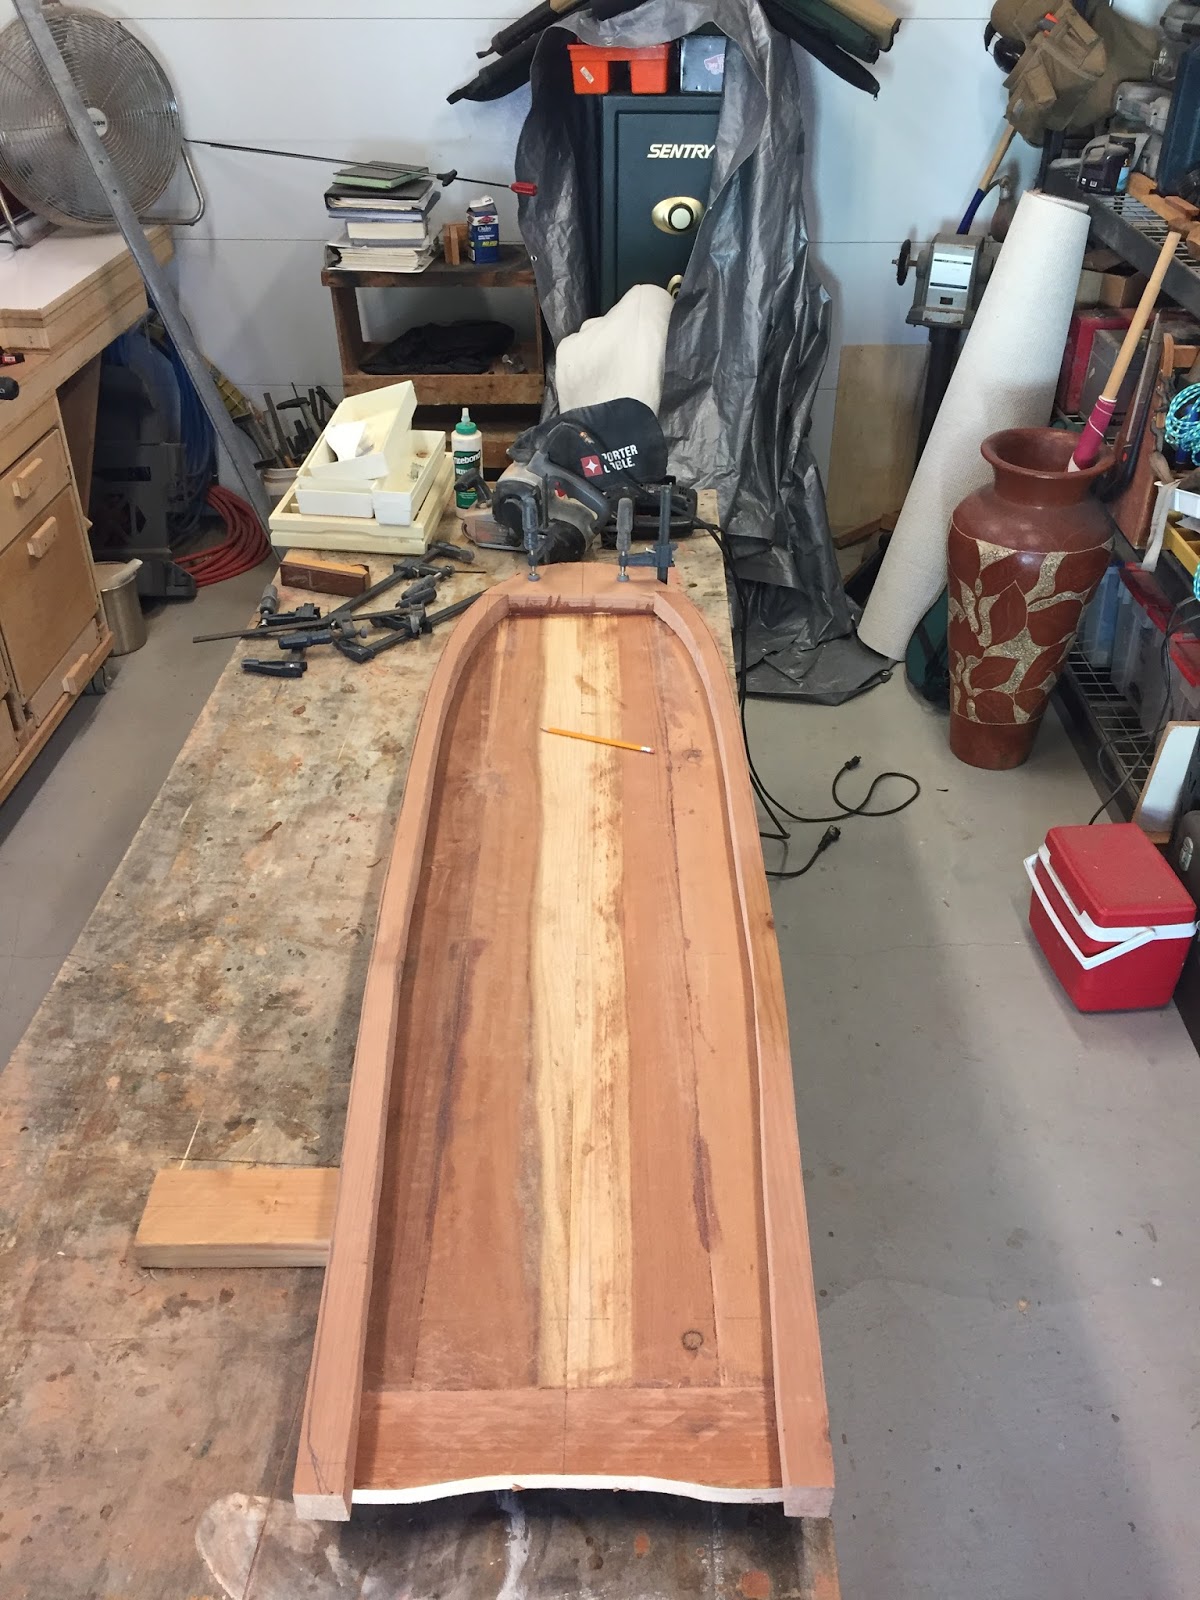
 This board has a built up nose and rails, which give it some nose rocker that helps with a steep drop in.  The rolled rail and the tail board give the board a bit of stiffness, so they don't break as easily as a flat alaia.  


When the glue is set, the side rails get chamfered on the inside and the thickness will be zero at the tail.  The nose block gets lots of shaping on the inside, so that there is a smooth transition from the deck to the nose and tops of the rail.  Because of the thicker rail, I'll put two tiny half moon fins just to give the rails a bit more bit in a steep face.  
This is the original model which got reshaped 4 or 5 times until i was happy with the rails.  I ended up with some pretty wide chined rails in the nose section. You can see the nice curves that the nose and rail have where they meet the deck.  This board developed stress cracks where the top rail has a joint.  The new board has a one piece rail to eliminate the joint.  

Wednesday, October 28, 2015

5 10 Simms finally done


I've had this out for two sessions now in 3-4' surf.  It paddles well and is definitely fast.  I'm still working on finding the sweet spot, but that will come with time.  Too far forward, the fins release and it gets squirrley, and too far back it does not want to turn. Ray Meek aka Stingray did a nice epoxy glass job and did  cool old school leash loop.

Friday, October 19, 2012

Mangeras Hand Plane


Second generation handplane.  The hardwood is mangeras, which looks alot like mahogany and the stringers are cedar.  It is a pretty dark wood with short strings of sap that are a nice golden color.  I started using hardwood as the previous hand strap anchors were pulling out of the softwoods.  This has more bottom curves and a nice deep channel.  The channel looks good but I'm not sure how much performance it adds if any!  They are super fun to make and absolutely fun to use!  

Saturday, July 7, 2012

5-10 Simms, Part II

Finally got a bit of time to work on the board.  Here's the progress:
 Ready for the top skin.  The top of the rail wood is all planed down to accept the deck. 
I built a center truss beam in-place after the ribs are installed, while the assembly is still in the rocker table.  This little stick beam replaces the conventional solid keel.  It is very stiff and very light.  I've also started adding left over bits of 1/4x1/4" stock to the ribs for additional gluing area for the top skin.  
 This is the rear with the blocking for the fins. 
 I'll glue on a solid tail block once the top skin is on. 
 You can never have too many clamps when the top skin goes on.  When I test fitted and clamped the skin on, the right half of the ply skin broke away from the hardwood decorative stringer I had glued into the skin.  So I glued on the left half, and the other half will go on in a few days. 
Gluey, gluey, clampy, clampy.


Finally, all sealed and ready for the glasser.  Hey, it only took like 3 years to get to this point!

As always, this will get a single layer of 4 ounce cloth and epoxy resin.  Fin set up is twin with a tiny trailer near the tail.  The fins will be epoxied into the grooves after the lamination coat.  This is a nice clean method, and in case the fin breaks, the skin or glass job is not damaged.  I would just rout out the groove again and install a new fin.


Here are the fins.  I had made a small set (bottom) for the board, but a shaper friend convinced me to use the full sized fins on the top.  I tend to underfin a lot of my boards so I agreed to try it.

They are single foiled and only about 3/8" thick.  I thought this was way too thin, but my friend John Cherry guaranteed they would perform, and yes they do!  The trailer is in the middle.  It is only about an inch high and 3" long, but it makes a huge difference in performance, giving significant hold and drive on a bottom turn and taking out any tail wiggle that is typical in a twin fin set up.


Deck

Ok, more pictures to follow after she's all glassed up and shiny!

Thursday, April 5, 2012

Mule Mods

I knew the bottom shape of the Mule was not ideal and it was apparent when I rode it.  There was too much volume in the first third of the board and I felt that the rails were way too thick there too.  Because of this, I had to stand really forward to have any control on the board.  I had some directional control standing up, but not a lot.  I could bellyboard it just fine, but standing up was really tricky. As it is a prototype, I had no problem taking the planer to the bottom and reshaping it as I would a foam blank.  I reduced the volume and thinned out the rails, giving the entry a much more conventional shape.


 Big difference on new and old rail.  


I'm hoping this will improve it's behavior. Next time I try a radical shape, it is going to be in foam and not wood!

Wednesday, November 30, 2011

Cigar Box Guitar

I had alot of fun making the ukulele, but really fun is building a simple blues guitar from a cigar box. I really enjoyed going to the second hand antique place here and scrounging around for a nice wood cigar box and miscellaneous bits for the instrument.  I followed some good-old-boy free plans from cigarboxguitars.com.  This is a great site with lots of information on how to build and play theses distinctly American instruments that were common from before the turn of the century into the '40's.  With tuners, strings, some radio shack electronics to make it electric and the box I spend just $30.  I used some mahogany from the garage stockpile for the neck and small parts.  Now I've got a quirky little three stringed guitar that is really fun to play and sounds damn good.  Check it out.


Thursday, November 17, 2011

Here are a few pictures of the completed mini-simms.


Tuesday, October 25, 2011

Hand Plane for the Surfdetective

A new and improved handplane for a friend.....fuller nose and nicer lines.  Enjoy it Eric!


Friday, September 16, 2011

More Mini - Simmons


 The fins roughed out

 I found some mahogany for the nose and tail blocks in the yard. 

Thursday, September 15, 2011

And Lid Goes On....

 All planed and ready for the top...

 All clamped up.   This is a hectic 20 minutes!
Some progress photos

Wednesday, September 7, 2011

A Few More Build Pictures

 The chine and starter rail strip going in.  
 Fin blocking details at the tail
I decided to make a laminated nose and tail block.  The dark wood is stick of mahogany I found in the side yard. 

Friday, September 2, 2011

7-2 Mini Simmons Start

Two kids moved out, one off to college, moved into to a smaller house, it has been a busy year.  Despite that, this will be my second board of the year and probably the last for 2011 (who knows?  Therapy is Therapy).  I've been talking to John Cherry recently and that reminded me that I've wanted to build a mini Simmons twin for several years now, after seeing John's gorgeous balsa 10-0 replica and his cool smaller versions.  With a bit of guidance from John I started cutting wood today. I'm still happy with using the 1/4" Sandeply.  It looks okay, but it's light and a fast build.  I think I'll tint this one just for fun.  The milled wood next to the layout is (1) redwood 2x4 x8' milled for rails and blocking.  That's it....a sheet of ply and one stick of wood.  I'm am stoked about this one.  Here is the general layout: 

 And the nose blocking...